
~Tahir Shah
So where to begin? I literally pulled out hundreds of photos, knowing I would only be using just a handful. Decisions, decisions...which ones to use. I don't remember where I first read this, but somewhere along the way I read "you can use a mixture of colored frames, as long as all your photos are black and white. If you use colored photos, then you want to stick with the same color of frame throughout your arrangement." OK, raise your hand it you said this!

So I decided black and white photos would look the best. After deciding which photos I wanted to use, I then went and had them made into B & W. I didn't like the way the first store did them, so I went to another and redid them all. Mr. Cottage said it didn't make a difference, but that's why I'm the decorator and he's not!

Using a very large Newspaper Print paper pad I bought from Michael's, I laid every frame, one at a time, and traced around it. I also put the title or name of the photo on each one, so I would know which paper went with what frame. Then the fun part began. I know I've read to lay your frames on the floor and decide that way, but for me it was much easier to play with it right on the wall. If I didn't like where one frame went, I just loosened the paint tape and moved it to another spot.

Once I was ready to start hanging the frames, I took each one and marked where the nails had to go. If there were two hooks on the back, then a level had to be used to make sure this frame would hang straight.
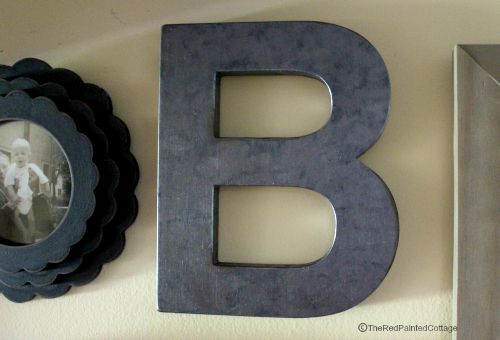
Remember my DIY galvanized metal letters? If not, you can read about them here.
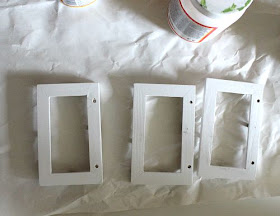
I also bought these tiny chalkboard tags from Kohls, knowing I was going to repaint the frames. Fortunately, the chalkboards could be removed easily, which made painting a breeze.

I decided to make them look like galvanized metal, too.


I decided to make them look like galvanized metal, too.

After the paint was dried, I wrote "Keys to our past" on the chalkboard using a General white charcoal pencil.

The hardest part of all this was rethreading the jute through the tiny openings. I finally just rubbed Elmer's glue onto the ends, twisting them as I did this, and then letting them dry. Easy Peasy!

Our fur babies are all part of our family. We have 6 granddogs, and many wonderful other dogs that were all part of our household. I still need to get a few more photos of a couple more dogs.

For those of you not aware, I have a dollhouse and this Fun-Tak is used to hold some of my items in place. A few of my frames didn't want to set real straight, so I used some of this behind them. Voila!

My big oval frame is hanging as is for now. I removed the big rusty wire and replaced it with smaller wires towards the top. I have a big project planned for it, but I'm in no hurry to begin.
So there you are! After months of hard work it all paid off. Ready to start yours?
I've joined the following link up parties:
DIY Show Off
A Tray of Bliss
Something To Talk About
Amaze Me Monday
A Stroll Thru Life
Make It Pretty Monday
Just A Girl and Her Blog
Wow Us Wednesdays
Tuesdays At Our Home
Moonlight and Mason Jars
Work It Wednesday
Ivy and Elephants
Share Your Style
Wordless Wednesday
Thursday Favorite Things
Your Turn To Shine
Inspiration Thursday
AKA Design
My Flagstaff Home
Great tutorial bits here. I like the unattributed quote---good idea and makes total sense to keep frames consistent. Love your little tags. Thanks for a morning prod as I have oodles of generations of photos/portraits of several family trees. Sandi
ReplyDeleteI so want to do this to our staircase, but my abstract thinking is almost non-existent, and I'm afraid of the outcome.....I like the way you were able to lay things out before committing to holes in the wall! Would've loved an "after" picture too!
ReplyDeleteSuch a great project, Carol! Thanks for sharing at the Weekend Blog Hop at My Flagstaff Home!
ReplyDeleteJennifer
This is a great tutorial! Love your tips. Thanks so much for sharing at Inspiration Thursday! Have a fantastic week!
ReplyDelete